SillyTavern轻松搭:免费VPS服务器租用和布置教程
SillyTavern(酒馆/AI猫娘)系列
[展开/折叠]-
SillyTavern(酒馆)从入门到精通
喂饭式教学,不可能学不会
-
手机(Android)安装布置教程
随时随地逗逗猫娘的方法
-
免费VPS服务器租用和布置教程
通过第三方服务器开设酒馆教程
-
各种技巧/插件的说明
玩酒馆必看的进阶教程
-
GPT-SoVITS文本转语音入门教程(含SillyTavern酒馆接入)
AI语音合成,提升沉浸感的好方法
-
酒馆本地跑文字模型测试和推荐
当前还不太行的本地模型测评
-
盘点支持免费API调用的AI服务
需要免费接入酒馆的AI,来看这里吧
-
Gemini反代,免费API调用Gemini 3 pro模型
当前酒馆免费接入的AI中效果最好的选择!
真没想到SillyTavern酒馆能出到第三期教程,看来也是时候独立出来了。在BLOG主写下前两篇教程后,收到了许多朋友的反馈,其中最多的可能是在PC上布置,无法远程使用手机登录玩;又或者是使用手机布置,PC没法同步这样的问题。今天这篇教程,BLOG主就来尝试通过在VPS上布置来解决这个问题。
如果有朋友还是不清楚VPS是什么,那你可以直接理解成:在别人的服务器上,用别人提供的域名,布置你想要的服务,搞定之后你可以在任何时候(不需要你开机),任何地点(只要有网络),使用任何设备(PC/手机),直接通过对方提供的域名(网址),访问你的(酒馆)服务。
一、注册VPS
VPS,即Virtual Private Server,虚拟专用服务器。用最简单的话来说,就是服务商提供的远程计算机服务。我们租用他们提供的服务器(PC),远程运行所需要的程序,并且通过专用的域名进行访问。这次BLOG主推荐的,是近期很火的Claw Cloud服务器,他们最近提供了一个Github注册满180天,则免费赠送5美元/月的活动。该活动暂时看是永久的,因此只需要你拥有一个注册了半年的Github账户,就可以白嫖这个VPS了。
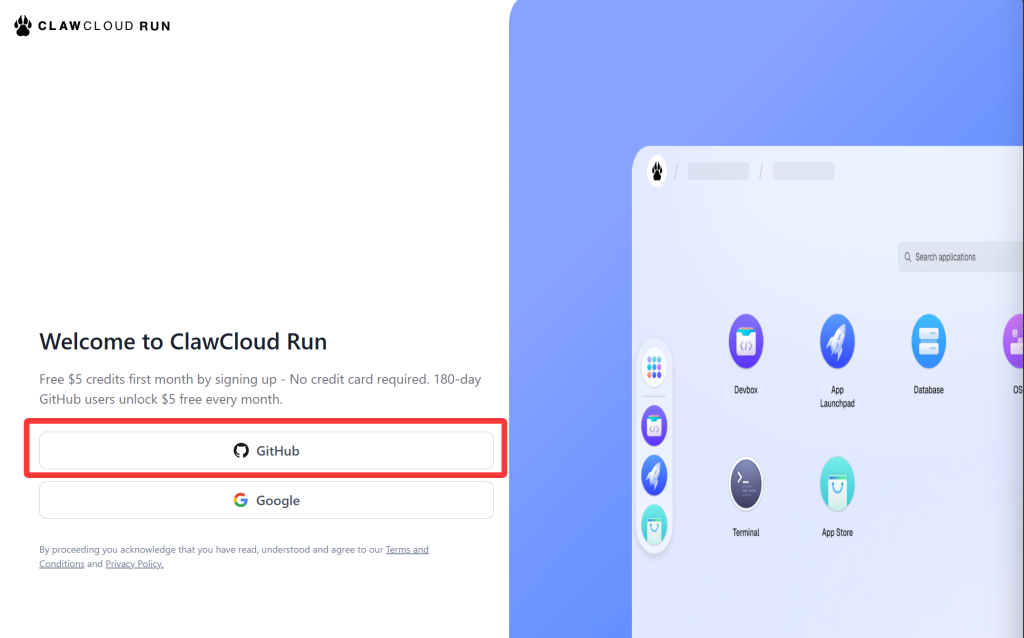
打开网站,点击GitHub,然后登录自己的Github账号即可完成注册。只要注册满180天,即可马上获得5美元的赠金。注册完成后,会弹出对话框,要求选择服务器的区域,推荐选择新加坡(Singapore)或者美国(US East/US West)。
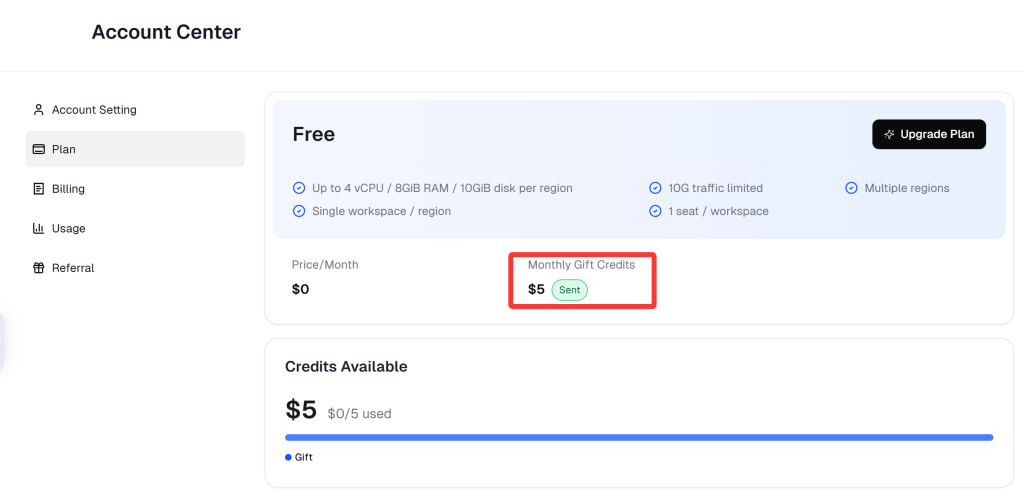
我们可以点击右上角头像-Billing-Plan中(上图)查看每月赠送金是否已经到账。
二、布置SillyTavern酒馆
1、设置区域

再次确认自己的区域是否是新加坡或者美国,切换到需要的建立VPS的服务区域。
2、新建VPS
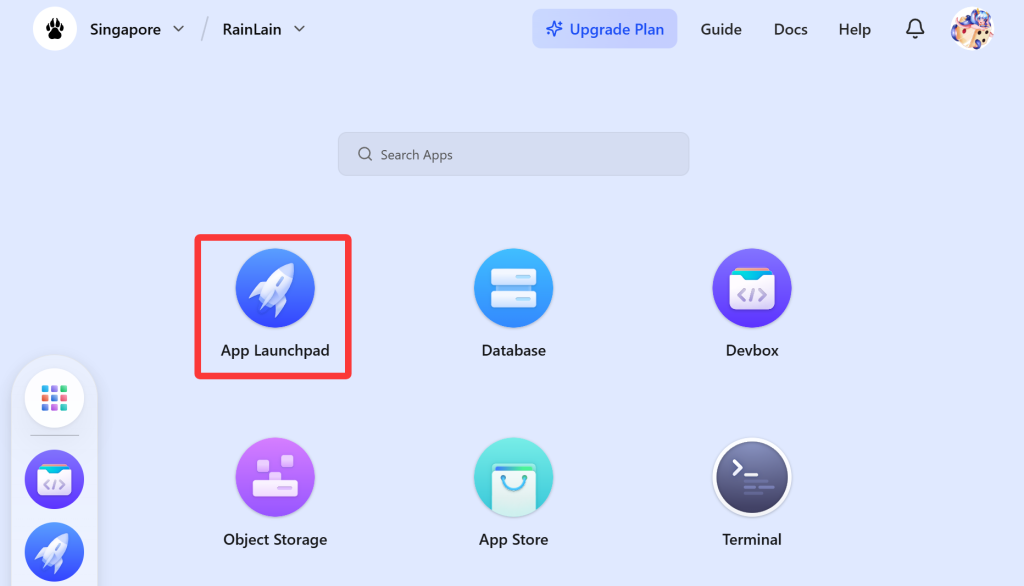
点击“App Launchpad”

在弹出的窗口中,点击右上方的“Create App”

Application Name:VPS实例名称,填写sillytavern或者你喜欢的任何好记的名字。
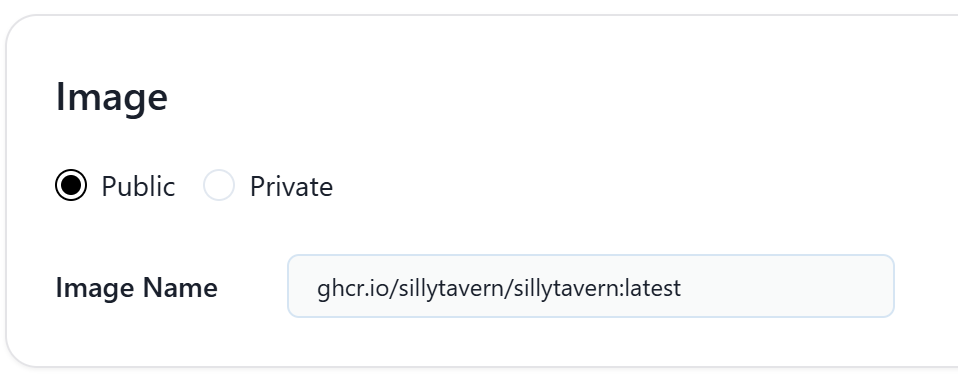
拉取酒馆的镜像在Image Name中填入
ghcr.io/sillytavern/sillytavern:latest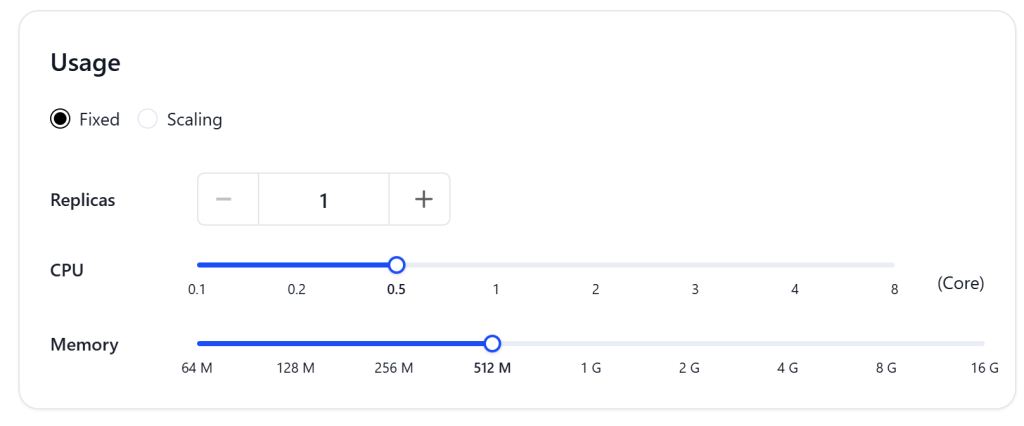
Usage部分为申请分配的CPU和内存性能,这里如图选择0.5CPU和512M内存。
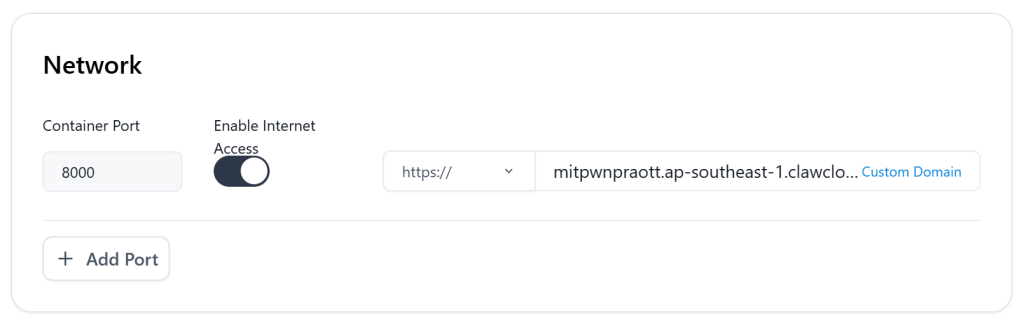
接着是网络访问部分,点击打开“Enable Internet Access”按钮允许远程访问,Container Port上填写酒馆的默认端口8000,右面的访问域名是随机生成的,自己私人使用可以不用管。
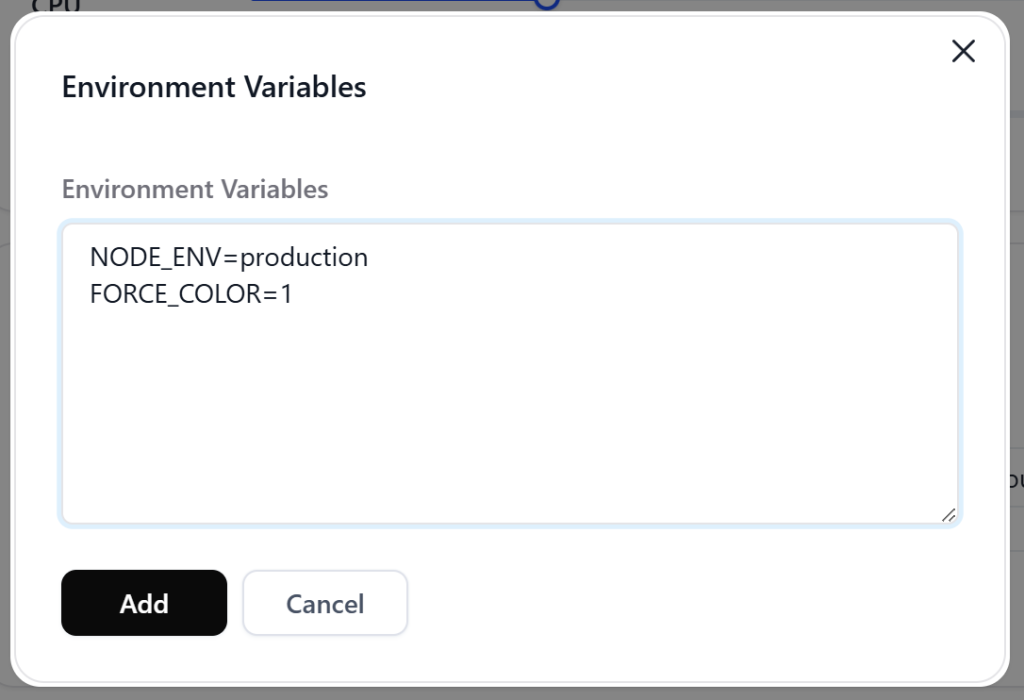
随后点击“Environment Variables”右面的“Add”,在对话框内填写一下内容,并再次按黑色“Add”按钮添加。其中“NODE_ENV”为设置Node.js最常见的变量,“production”是面向用户的正式环境。而“FORCE_COLOR”这个环境变量是控制命令行输出包含ANSI颜色的代码。“1”为强制开启的意思。
NODE_ENV=production
FORCE_COLOR=1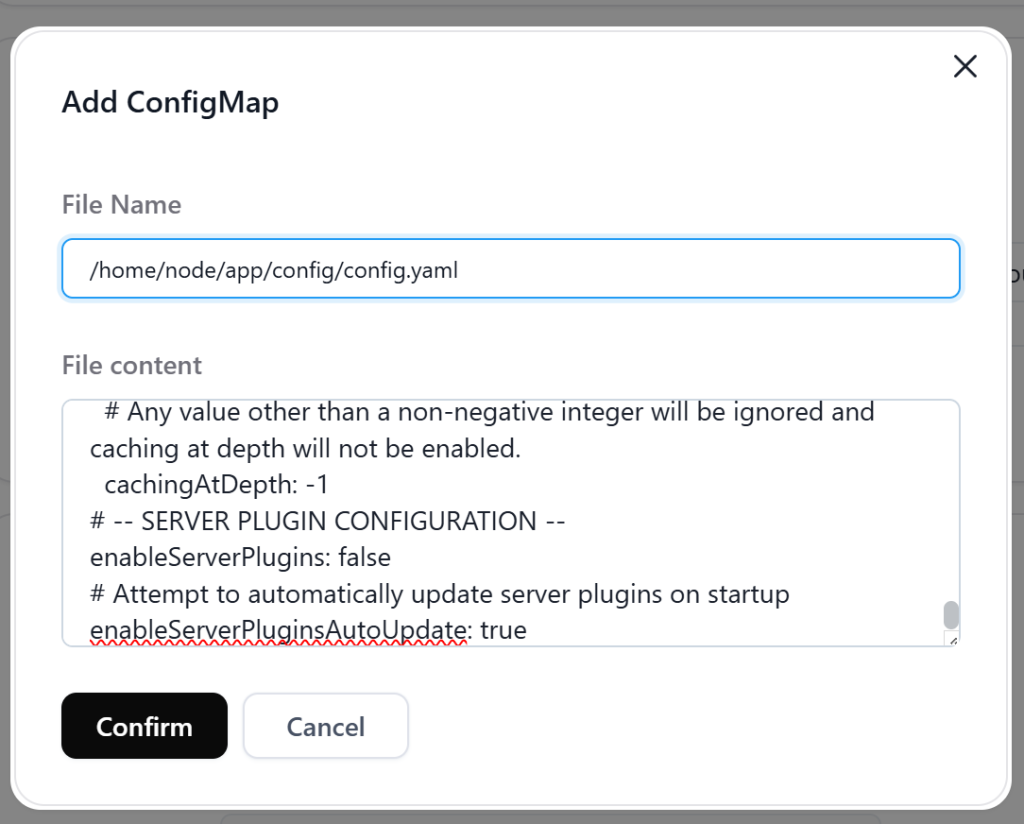
接着点击“Configmaps””右面的“Add”,在File Name中输入
/home/node/app/config/config.yaml随后在File content下输入以下内容。熟悉酒馆的朋友应该看出来了,这个就是酒馆的“config.yaml”设置文件。因此我们也可以继续沿用它的设置思路,对几个关键参数做定制。首先是“port: 8000”,后面的数字可以改成任意的端口,记住在刚刚的VPS开放端口设置中进行同步修改。“whitelistMode: false”白名单模式和“basicAuthMode: true”身份验证模式只能二选一打开。白名单模式无需账号密码,只要IP地址正确即可登陆了,身份验证模式则需要账号密码。basicAuthUser后面的username: “admin”以及password: “123456”是身份验证模式中的账号和密码,建议一定要修改。多用户模式必须使用“basicAuthUser”模式,并将下面选项设置为true“enableUserAccounts: true”。点击“Confirm”确定。
# -- DATA CONFIGURATION --
# Root directory for user data storage
dataRoot: ./data
# -- SERVER CONFIGURATION --
# Listen for incoming connections
listen: true
# Listen on a specific address, supports IPv4 and IPv6
listenAddress:
  ipv4: 0.0.0.0
  ipv6: '[::]'
# Enables IPv6 and/or IPv4 protocols. Need to have at least one enabled!
# - Use option "auto" to automatically detect support
# - Use true or false (no qoutes) to enable or disable each protocol
protocol:
    ipv4: true
    ipv6: false
# Prefers IPv6 for DNS. Enable this on ISPs that don't have issues with IPv6
dnsPreferIPv6: false
# The hostname that autorun opens.
# - Use "auto" to let the server decide
# - Use options like 'localhost', 'st.example.com'
autorunHostname: "auto"
# Server port
port: 8000
# Overrides the port for autorun in browser.
# - Use -1 to use the server port.
# - Specify a port to override the default.
autorunPortOverride: -1
# -- SSL options --
ssl:
  enabled: false
  certPath: "./certs/cert.pem"
  keyPath: "./certs/privkey.pem"
# -- SECURITY CONFIGURATION --
# Toggle whitelist mode
whitelistMode: false
# Whitelist will also verify IP in X-Forwarded-For / X-Real-IP headers
enableForwardedWhitelist: true
# Whitelist of allowed IP addresses
whitelist:
  - ::1
  - 127.0.0.1
# Automatically whitelist Docker host and gateway IPs
whitelistDockerHosts: true
# Toggle basic authentication for endpoints
basicAuthMode: true
# Basic authentication credentials
basicAuthUser:
  username: "admin"
  password: "123456"
# Enables CORS proxy middleware
enableCorsProxy: false
# -- REQUEST PROXY CONFIGURATION --
requestProxy:
  # If a proxy is enabled, all outgoing HTTP/HTTPS requests will be routed through it.
  enabled: false
  # Proxy URL. Possible protocols: http, https, socks, socks5, socks4, pac
  url: "socks5://username:password@example.com:1080"
  # Proxy bypass list. Requests to these hosts won't be routed through the proxy.
  bypass:
    - localhost
    - 127.0.0.1
# Enable multi-user mode
enableUserAccounts: false
# Enable discreet login mode: hides user list on the login screen
enableDiscreetLogin: false
# Enable's authlia based auto login. Only enable this if you
# have setup and installed Authelia as a middle-ware on your
# reverse proxy
# https://www.authelia.com/
# This will use auto login to an account with the same username
# as that used for authlia. (Ensure the username in authlia
# is an exact match with that in sillytavern)
autheliaAuth: false
# If `basicAuthMode` and this are enabled then
# the username and passwords for basic auth are the same as those
# for the individual accounts
perUserBasicAuth: false

# User session timeout *in seconds* (defaults to 24 hours).
## Set to a positive number to expire session after a certain time of inactivity
## Set to 0 to expire session when the browser is closed
## Set to a negative number to disable session expiration
sessionTimeout: -1
# Disable CSRF protection - NOT RECOMMENDED
disableCsrfProtection: false
# Disable startup security checks - NOT RECOMMENDED
securityOverride: false
# -- LOGGING CONFIGURATION --
logging:
  # Enable access logging to access.log file
  # Records new connections with timestamp, IP address and user agent
  enableAccessLog: true
  # Minimum log level to display in the terminal (DEBUG = 0, INFO = 1, WARN = 2, ERROR = 3)
  minLogLevel: 0
# -- RATE LIMITING CONFIGURATION --
rateLimiting:
  # Use X-Real-IP header instead of socket IP for rate limiting
  # Only enable this if you are using a properly configured reverse proxy (like Nginx/traefik/Caddy)
  preferRealIpHeader: false
# -- ADVANCED CONFIGURATION --
# Open the browser automatically
autorun: true
# Avoids using 'localhost' for autorun in auto mode.
# use if you don't have 'localhost' in your hosts file
avoidLocalhost: false

## BACKUP CONFIGURATION
backups:
  # Common settings for all backup types
  common:
    # Number of backups to keep for each chat and settings file
    numberOfBackups: 50
  chat:
    # Enable automatic chat backups
    enabled: true
    # Maximum number of chat backups to keep per user (starting from the most recent). Set to -1 to keep all backups.
    maxTotalBackups: -1
    # Interval in milliseconds to throttle chat backups per user
    throttleInterval: 10000

# THUMBNAILING CONFIGURATION
thumbnails:
  # Enable thumbnail generation
  enabled: true
  # Image format of avatar thumbnails:
  # * "jpg": best compression with adjustable quality, no transparency
  # * "png": preserves transparency but increases filesize by about 100%
  # Changing this only affects new thumbnails. To recreate the old ones, clear out /thumbnails folder in your user data.
  format: "jpg"
  # JPG thumbnail quality (0-100)
  quality: 95
  # Maximum thumbnail dimensions per type [width, height]
  dimensions: { 'bg': [160, 90], 'avatar': [96, 144] }

# PERFORMANCE-RELATED CONFIGURATION
performance:
  # Enables lazy loading of character cards. Improves performances with large card libraries.
  # May have compatibility issues with some extensions.
  lazyLoadCharacters: false
  # The maximum amount of memory that parsed character cards can use. Set to 0 to disable memory caching.
  memoryCacheCapacity: '100mb'

# Allow secret keys exposure via API
allowKeysExposure: true
# Skip new default content checks
skipContentCheck: false
# Allowed hosts for card downloads
whitelistImportDomains:
  - localhost
  - cdn.discordapp.com
  - files.catbox.moe
  - raw.githubusercontent.com
# API request overrides (for KoboldAI and Text Completion APIs)
## Note: host includes the port number if it's not the default (80 or 443)
## Format is an array of objects:
## - hosts:
##  - example.com
##  headers:
##    Content-Type: application/json
##  - 127.0.0.1:5001
##  headers:
##    User-Agent: "Googlebot/2.1 (+http://www.google.com/bot.html)"
requestOverrides: []

# EXTENSIONS CONFIGURATION
extensions:
  # Enable UI extensions
  enabled: true
  # Automatically update extensions when a release version changes
  autoUpdate: true
  models:
    # Enables automatic model download from HuggingFace
    autoDownload: true
    # Additional models for extensions. Expects model IDs from HuggingFace model hub in ONNX format
    classification: Cohee/distilbert-base-uncased-go-emotions-onnx
    captioning: Xenova/vit-gpt2-image-captioning
    embedding: Cohee/jina-embeddings-v2-base-en
    speechToText: Xenova/whisper-small
    textToSpeech: Xenova/speecht5_tts

# Additional model tokenizers can be downloaded on demand.
# Disabling will fallback to another locally available tokenizer.
enableDownloadableTokenizers: true
# -- OPENAI CONFIGURATION --
# A placeholder message to use in strict prompt post-processing mode when the prompt doesn't start with a user message
promptPlaceholder: "[Start a new chat]"
openai:
  # Will send a random user ID to OpenAI completion API
  randomizeUserId: false
  # If not empty, will add this as a system message to the start of every caption completion prompt
  # Example: "Perform the instructions to the best of your ability.\n" (for LLaVA)
  # Not used in image inlining mode
  captionSystemPrompt: ""
# -- DEEPL TRANSLATION CONFIGURATION --
deepl:
  # Available options: default, more, less, prefer_more, prefer_less
  formality: default
# -- MISTRAL API CONFIGURATION --
mistral:
  # Enables prefilling of the reply with the last assistant message in the prompt
  # CAUTION: The prefix is echoed into the completion. You may want to use regex to trim it out.
  enablePrefix: false
# -- OLLAMA API CONFIGURATION --
ollama:
  # Controls how long the model will stay loaded into memory following the request
  # * -1: Keep the model loaded indefinitely
  # * 0: Unload the model immediately after the request
  # * N (any positive number): Keep the model loaded for N seconds after the request.
  keepAlive: -1
  # Controls the "num_batch" (batch size) parameter of the generation request
  # * -1: Use the default value of the model
  # * N (positive number): Use the specified value. Must be a power of 2, e.g. 128, 256, 512, etc.
  batchSize: -1
# -- ANTHROPIC CLAUDE API CONFIGURATION --
claude:
  # Enables caching of the system prompt (if supported).
  # https://docs.anthropic.com/en/docs/build-with-claude/prompt-caching
  # -- IMPORTANT! --
  # Use only when the prompt before the chat history is static and doesn't change between requests
  # (e.g {{random}} macro or lorebooks not as in-chat injections).
  # Otherwise, you'll just waste money on cache misses.
  enableSystemPromptCache: false
  # Enables caching of the message history at depth (if supported).
  # https://docs.anthropic.com/en/docs/build-with-claude/prompt-caching
  # -- IMPORTANT! --
  # Use with caution. Behavior may be unpredictable and no guarantees can or will be made.
  # Set to an integer to specify the desired depth. 0 (which does NOT include the prefill)
  # should be ideal for most use cases.
  # Any value other than a non-negative integer will be ignored and caching at depth will not be enabled.
  cachingAtDepth: -1
# -- SERVER PLUGIN CONFIGURATION --
enableServerPlugins: false
# Attempt to automatically update server plugins on startup
enableServerPluginsAutoUpdate: true
最后,我们需要设置VPS的存储空间(硬盘大小),点击“Local Storage”右面的“Add”按钮,在Capacity中填写2,意思是申请2G空间,下面的Mount Path填入以下内容,最终点击“Confirm”确认。
/home/node/app/data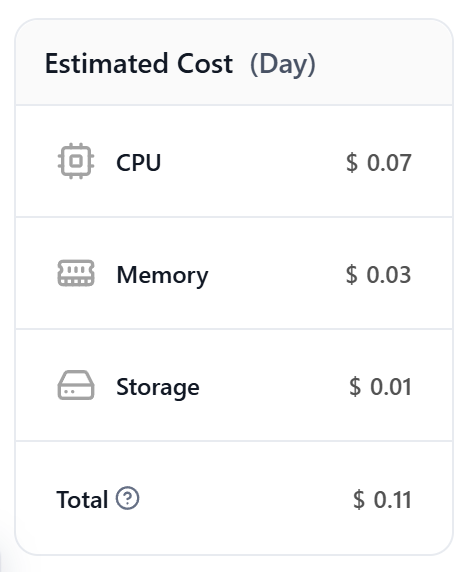
全部设置好后,我们可以看到报价面板,当前显示是0.11美元/天,31计算,总费用为3.41美元/月。查阅文档可知,当前流量费用为0.05美元/GB。也就是说每月有超过30GB的流量,理论上对个人用户来说,哪怕跑一个Komga服务也是绰绰有余了。(这就体现出多github账号的好处了)
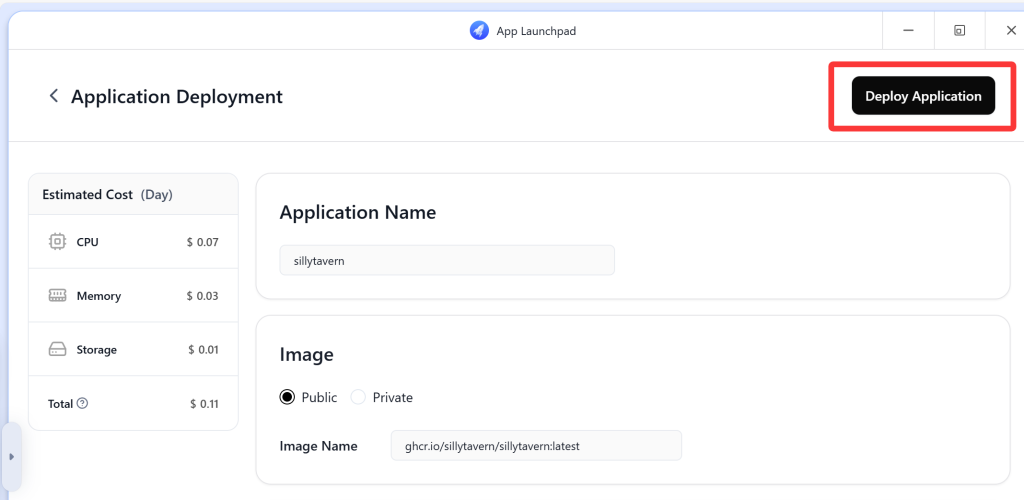
好了,确认好费用后,我们点击右上方的“Deploy Application”按钮,确定创建VPS应用。
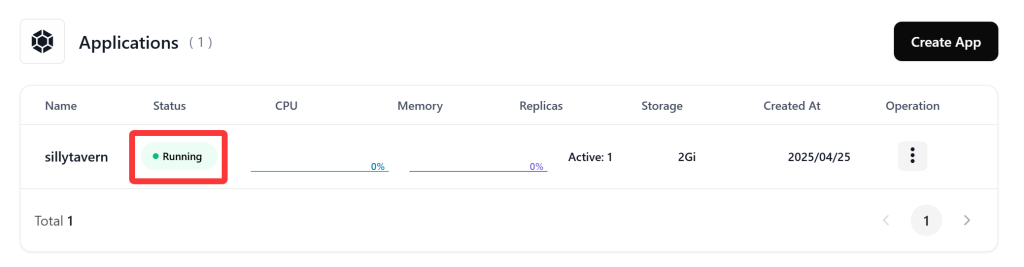
过个几分钟,当我们看到Status显示为“Running”的时候,就表示该服务已经顺利运行了!

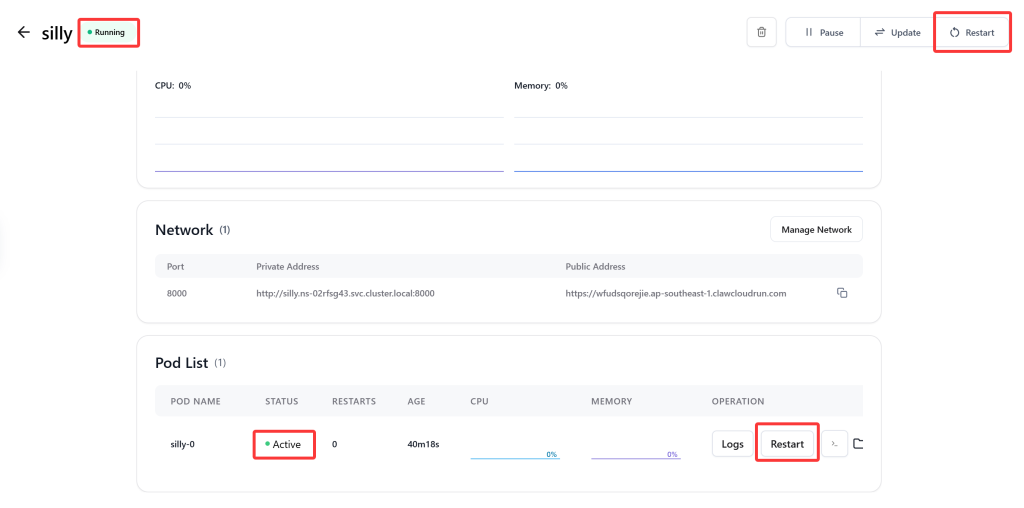
随后点进该服务,找到Network项目,右面的“Public Address”下的域名,就是公网可以访问的地址了!我们直接复制到浏览器中打开,等待一段时间的载入之后,酒馆就会顺利运行!接下来申请API和各类操作,可以查看这篇教程最上方,酒馆系列教程的第一期,这里就不多做赘述,祝各位玩的开心。
三、答疑解惑
有些时候,Claw Cloud会一直显示“Waiting”,没办法变成绿色的“Running”,反复重启服务器都没用。经过BLOG主验证,发现重启服务器(右上角的Restart)并不会正确加载修改过的参数。正确的做法是点击右下方的“Restart”,然后再点右上方的“Restrat”……相当蛋疼。


12条评论
cikz
创建好之后域名进不去诶 挂t也进不去
huoyanyan
对的,非常不稳定,可能这几天涌进去太多人了
motorloa@rommiui.com
感谢前辈的多用户教程,之前只有前半段多用户模式开关教程,找到的文档本身就没有关于白名单和基础用户验证的说法,一直卡在这里不得寸进,就是不知道必须选一个开启才能启动容器,没想到能在这里找到完整的教程。
另外补充一点个人小小的发现,在开启基础用户验证和多用户模式后,只要用二号管理用户禁用了默认用户,那么这时候关掉基础用户验证也不会出问题,同样把白名单关掉,酒馆依然可以启动,并且进行账号密码登陆。
另外想吐槽一下,酒馆本身不支持用户主动登陆注册,这个挺难受的,手动注册给人分发账号光想想就知道要消耗多大精力,如果要从零开始打造一个用户系统,那更是要投入海量的时间精力和各种成本。
huoyanyan
这也是第三方酒馆平台收费的原因。。。确实是有点难蚌
呜呜呜
请问有办法解决重启服务器扩展插件掉光的问题嘛?这两天酒馆更新,正则、user人设、扩展全掉光了,重设置好累…
huoyanyan
。。。VPS可能确实有点麻烦,暂时没找到好方法。
ta1henyoi
大佬你好,请问我的cli反代加HF怎么使用在vps服务器
huoyanyan
不知道,这服务器跟我相性巨差无比,各种BUG和连不上……确实有人说直接拿着个做API池更好用,但是我已经不想折腾这个东西了
ta1henyoi
我发现把cli反代部署到HF中就行了不用搞到vps,现在最大问题是怎么把我本地的酒馆账号搞到vps上我现在开了另外一个服务器(zeabur),新的号啥也没有
wxn
大佬。用了一段时间突然terminated,怎么把角色卡抢救出来呢
huoyanyan
。。。不知道
wxn
你的yaml文件有误所以,出了问题,但说实话爪云虽然给的不少但不如z家好使